
Google Search Console (formerly known as Google Webmasters Tool), is a free and simple tool offered by Google that helps understand how your site is performing on Google search as well as how you can improve your website for better rankings and results. It’s a must for any business to boost and maintain a positive search presence for your online dating business.
The following guide takes you through the process of how to set up Google Search Console so you can grow your online dating’s business presence.
{{cta(‘5b62da71-9e5c-4fb7-a276-25bfedfab1cf’,’justifycenter’)}}
I. Generating the tracking code for your site
II. Verify your site on Google Search Console
III. Link Google Search Console to Google Analytics
IIII. Build and submit a sitemap
V. View your sites’ performance
What can be achieved with Search Console?
- Confirm that Google can find and crawl your site
- Fix indexing problems and request re-indexing of new or updated content
- View Google Search traffic data for your site: how often your site appears in Google Search, which search queries show your site and more
- Show you which sites link to your website
The benefits
- Get valuable insights out of your Google Search Console account
- Improve your overall site performance by detecting issues quickly
- Easily track the performance of your website
- Track the progress of content marketing efforts
Before you begin
You’ll need to ensure you have an account set up on Google Analytics first. Once this has been done creating an account for Google Search Console is easy.
Once your Google Analytics and Google Search Console account have been set up, you’re ready to get started!
Need help with setting up a Google Analytics account? Find out how to get started here or reach out to your partner manager today.
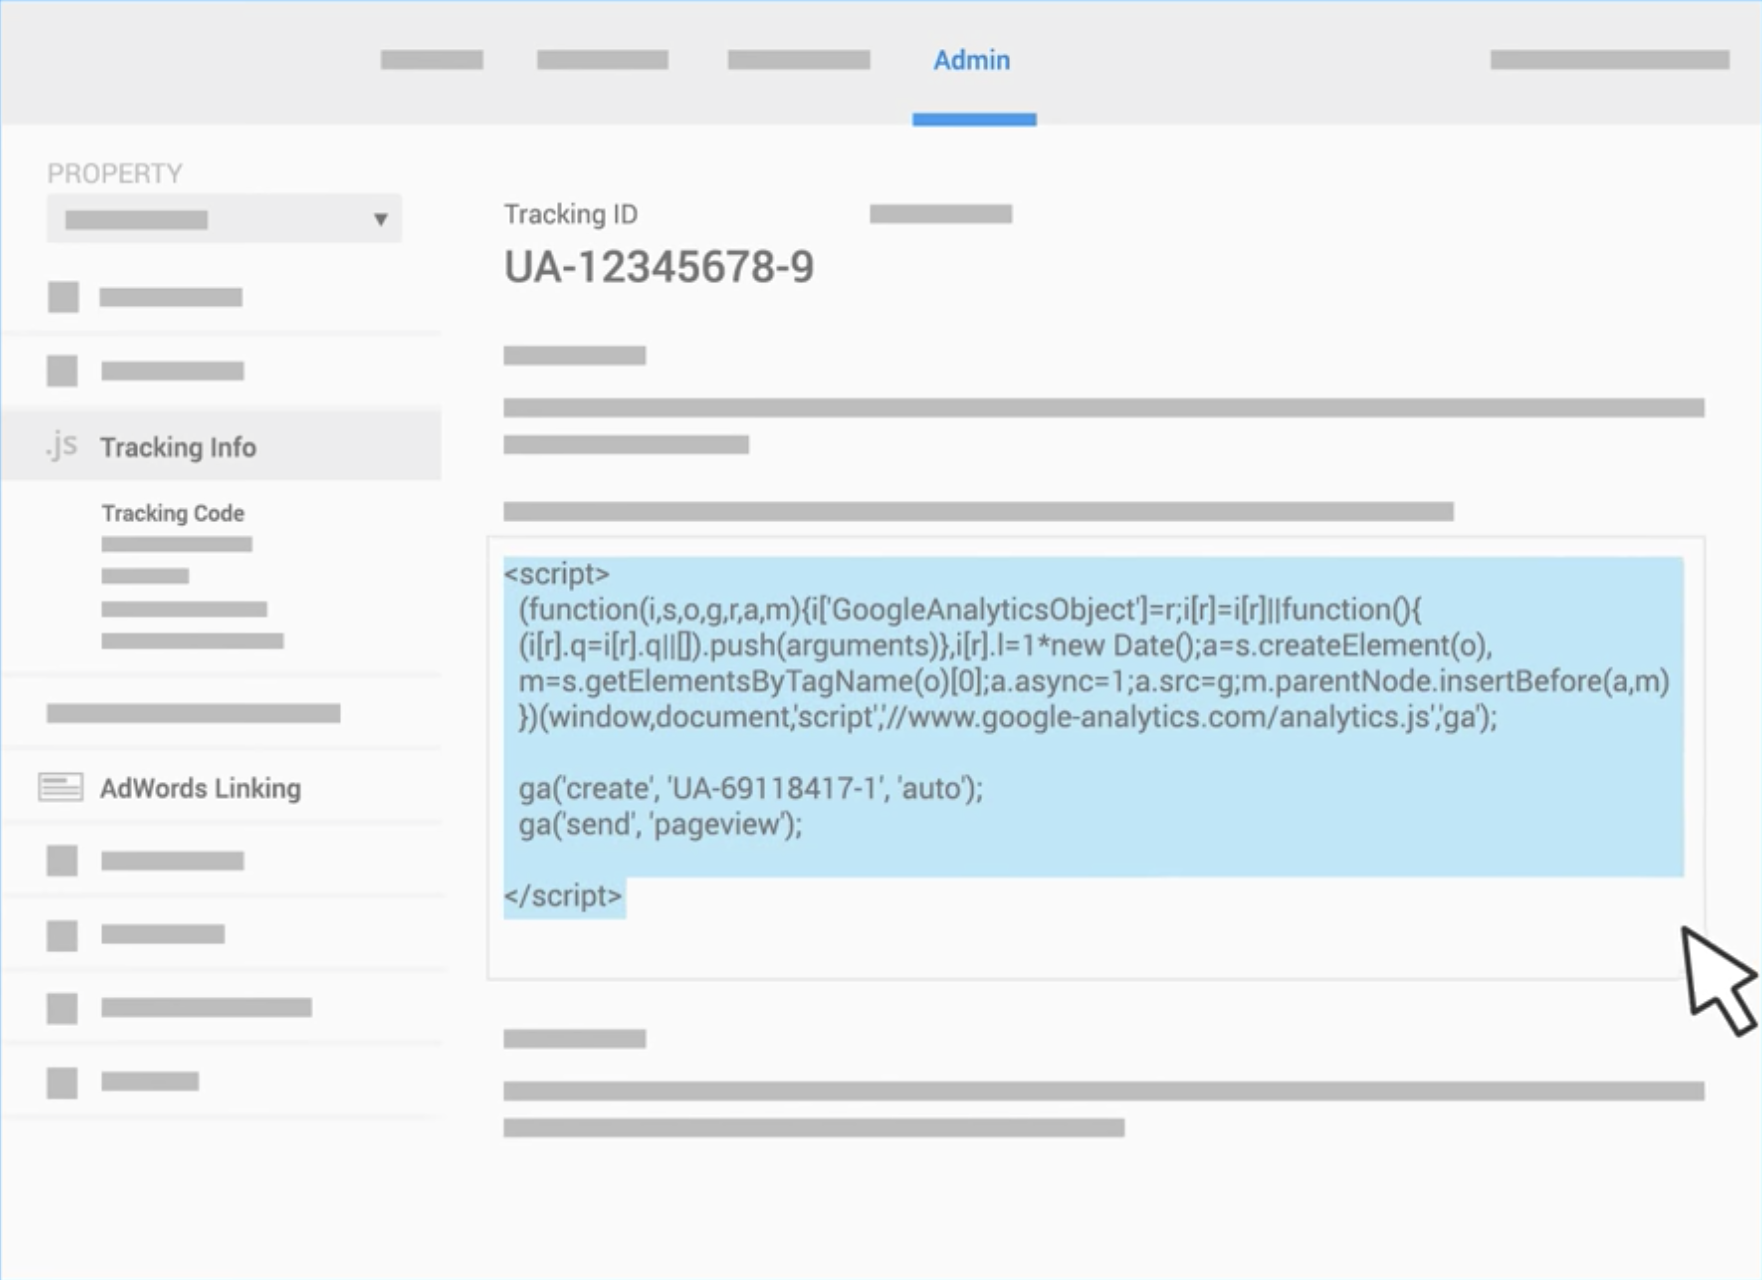
Step 1: Generate the tracking code for your site
After you’ve created your accounts, you’ll need to add the tracking code to your landing page. This is so you can collect data about user behaviour.
- Sign into Google Analytics.
- Click Admin and navigate to Account > Property > View and select the site you wish to track.
- To locate the tracking code go to Tracking info > Tracking ID.
You’ll need to copy the snippet under Global Site Tag and add this to the landing page you wish to track.
If your site is hosted on the WLD Design Tool you’ll need to add your tracking code to the field ‘Experiment Code’.

Once you have added your tracking code to your site, you should see data immediately in the Google Analytics real-time reports.
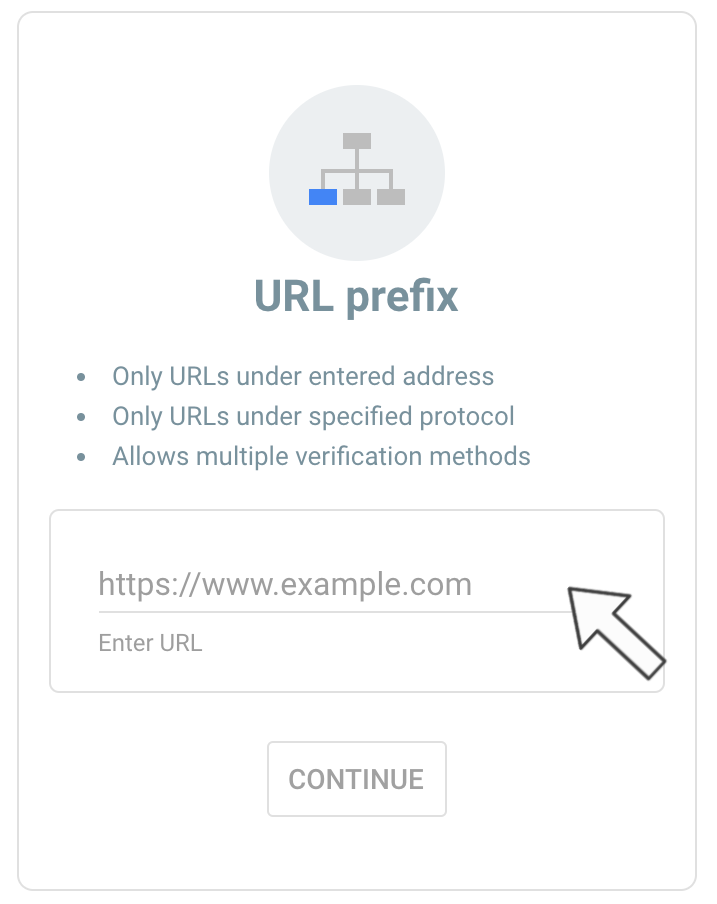
Step 2: Verify your site on Google Search Console
After adding your tracking code to your site, it’s time to verify your site within the Google Search Console.
- Sign into Google Search Console
- Go to Add property and select the property type. If your site is hosted on the WLD Design Tool you will need to select URL prefix
- Copy and paste the site URL into the blank field. When entering the site URL it’s important to remember that it’s a strict entry, meaning http: and https: are counted as different sites.
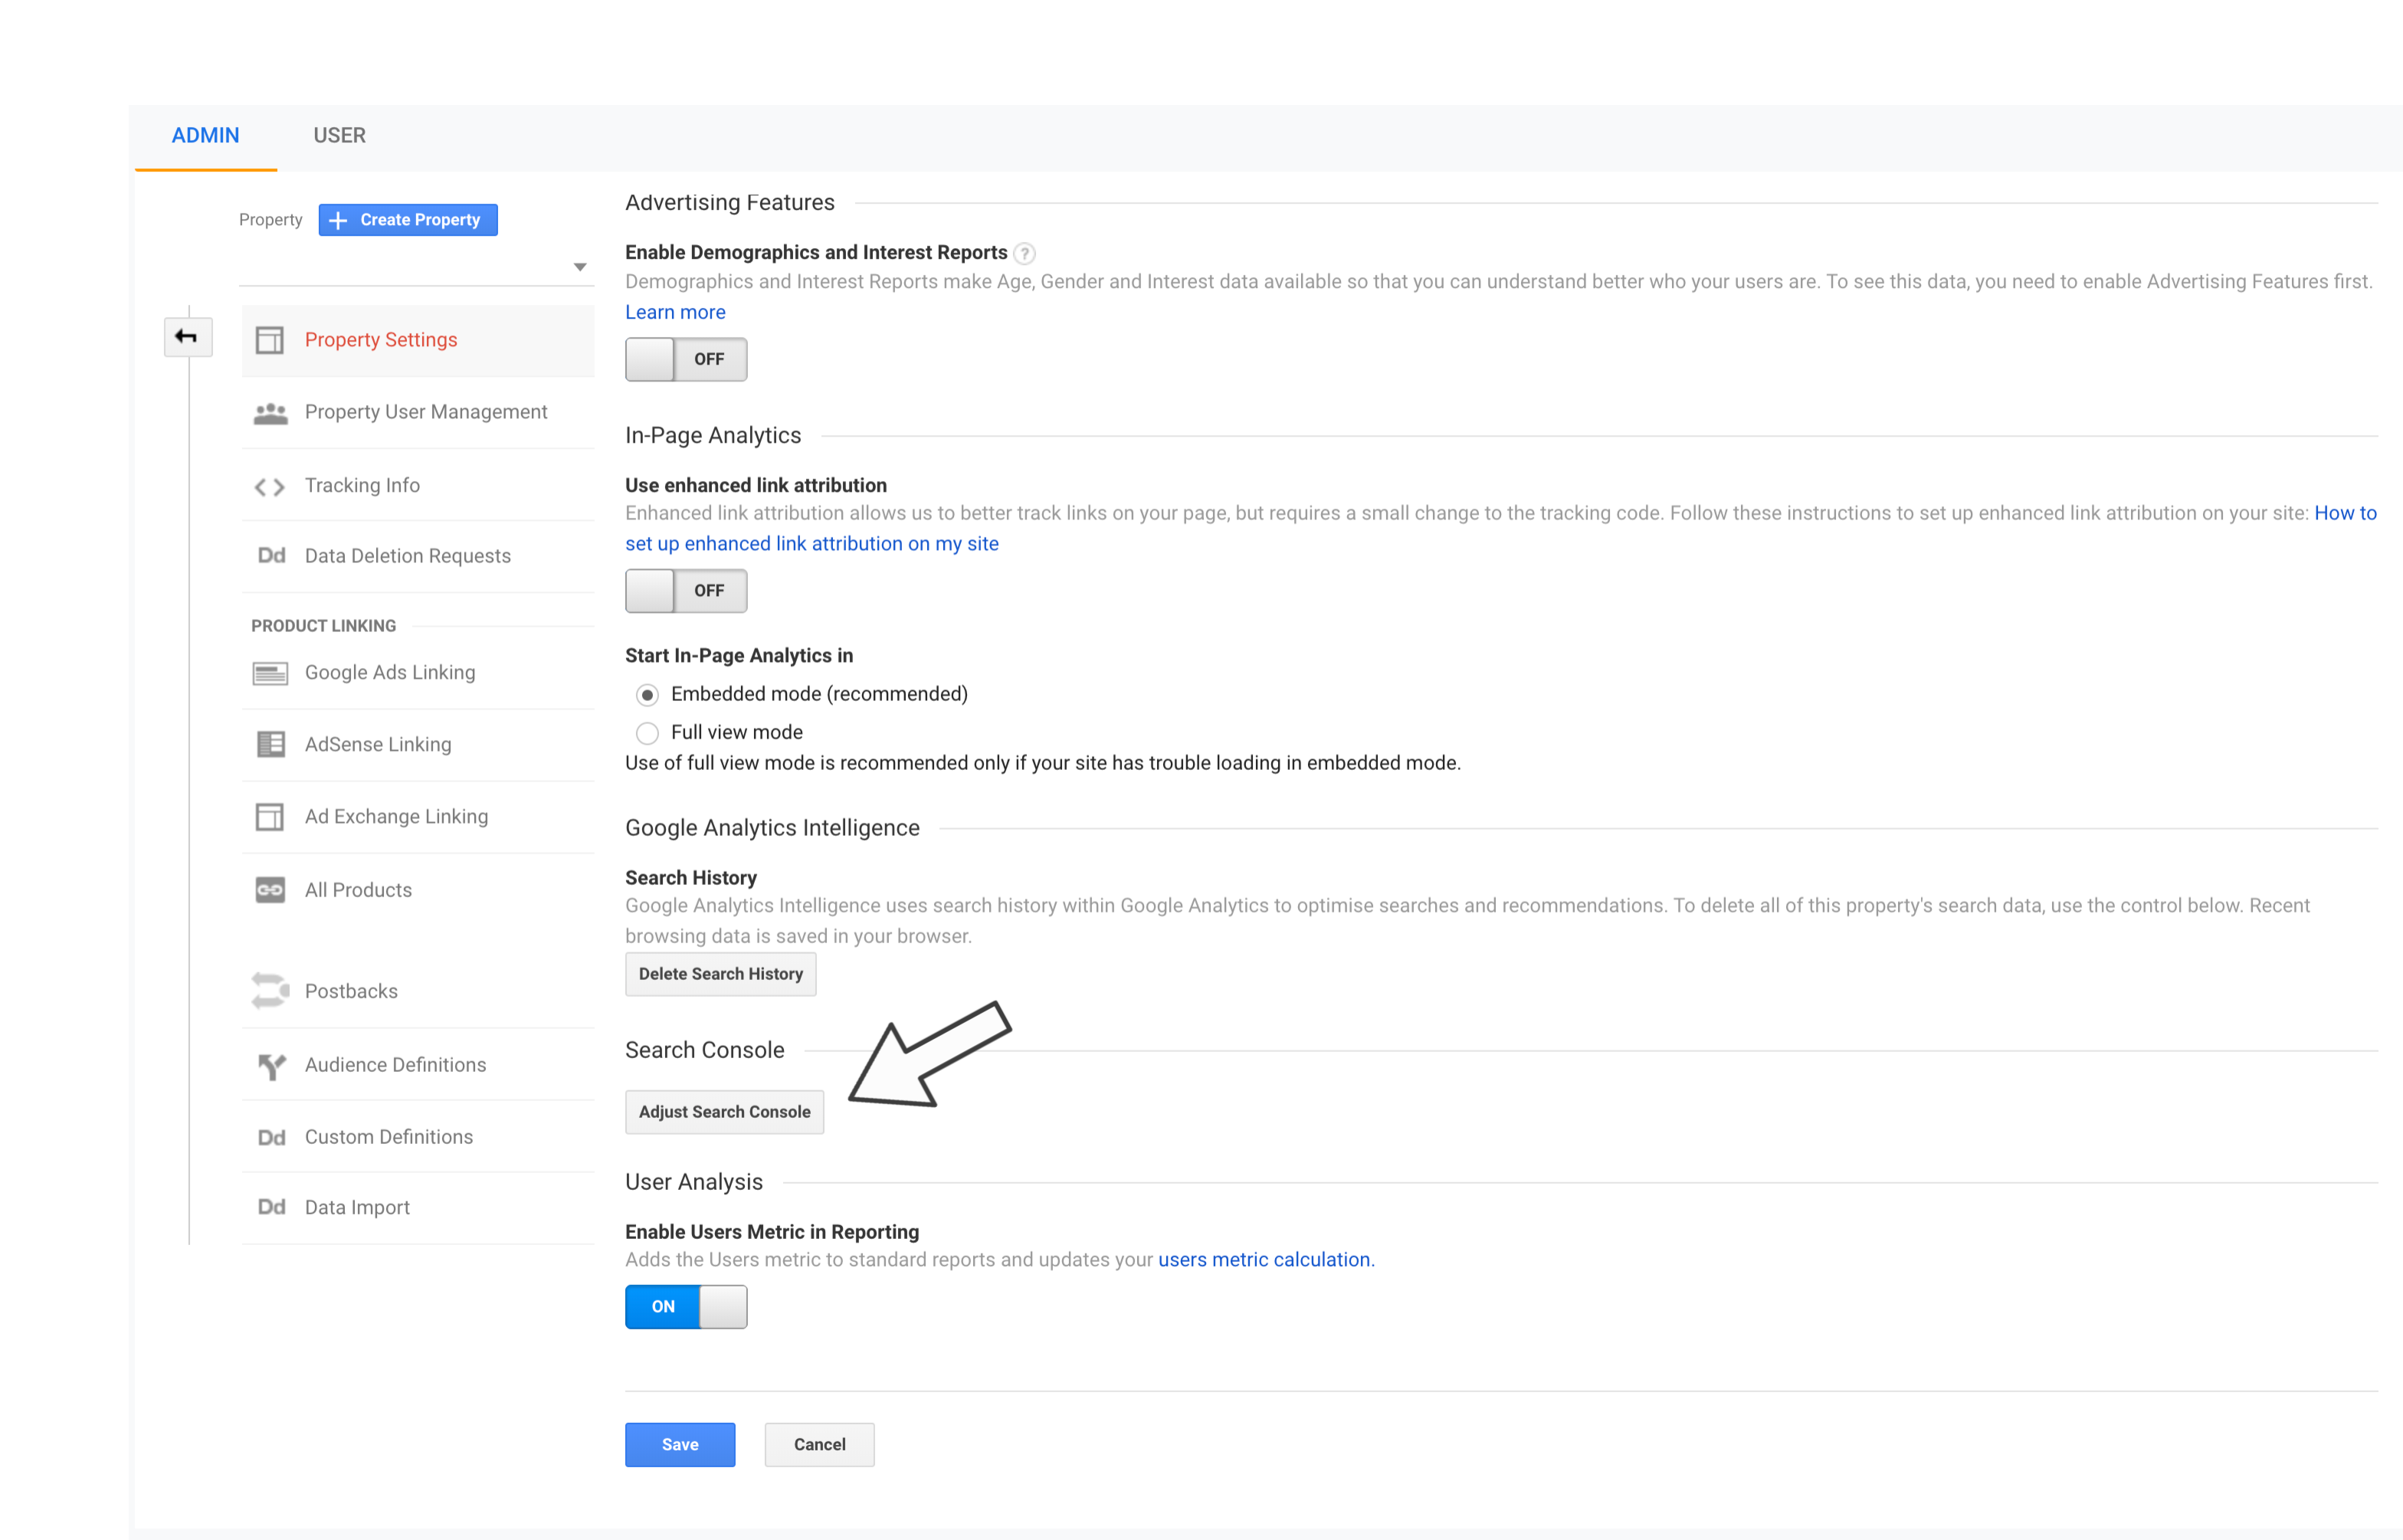
Step 3: Linking Google Search Console to Google Analytics
Once you have verified your site in Google Search Console you’ll want to link this to your Google Analytics account. By linking your Analytics property to your Search Console account(s), data from the Search Console will be imported in Analytics and included in your Google Analytics reporting.
- Sign into Google Analytics. Make sure you are using the same Google account to login to both.
- Under the site select Property settings > Adjust Search Console. By selecting this you will gain access to Google Search Console settings
- Click Add. Select the Search Console site and click Save. Once you have saved this you will be redirected to Google Search Console. Your properties are now linked!
Step 4: Build and submit a sitemap
A sitemap is a file where you provide information about the pages, videos, and other files on your site, and the relationships between them. Search engines like Google read this file to more intelligently crawl your site.
Sitemaps will improve your sites’ crawlability. By setting up a sitemap, this leads Google to all of your important pages and provides valuable information about these files.
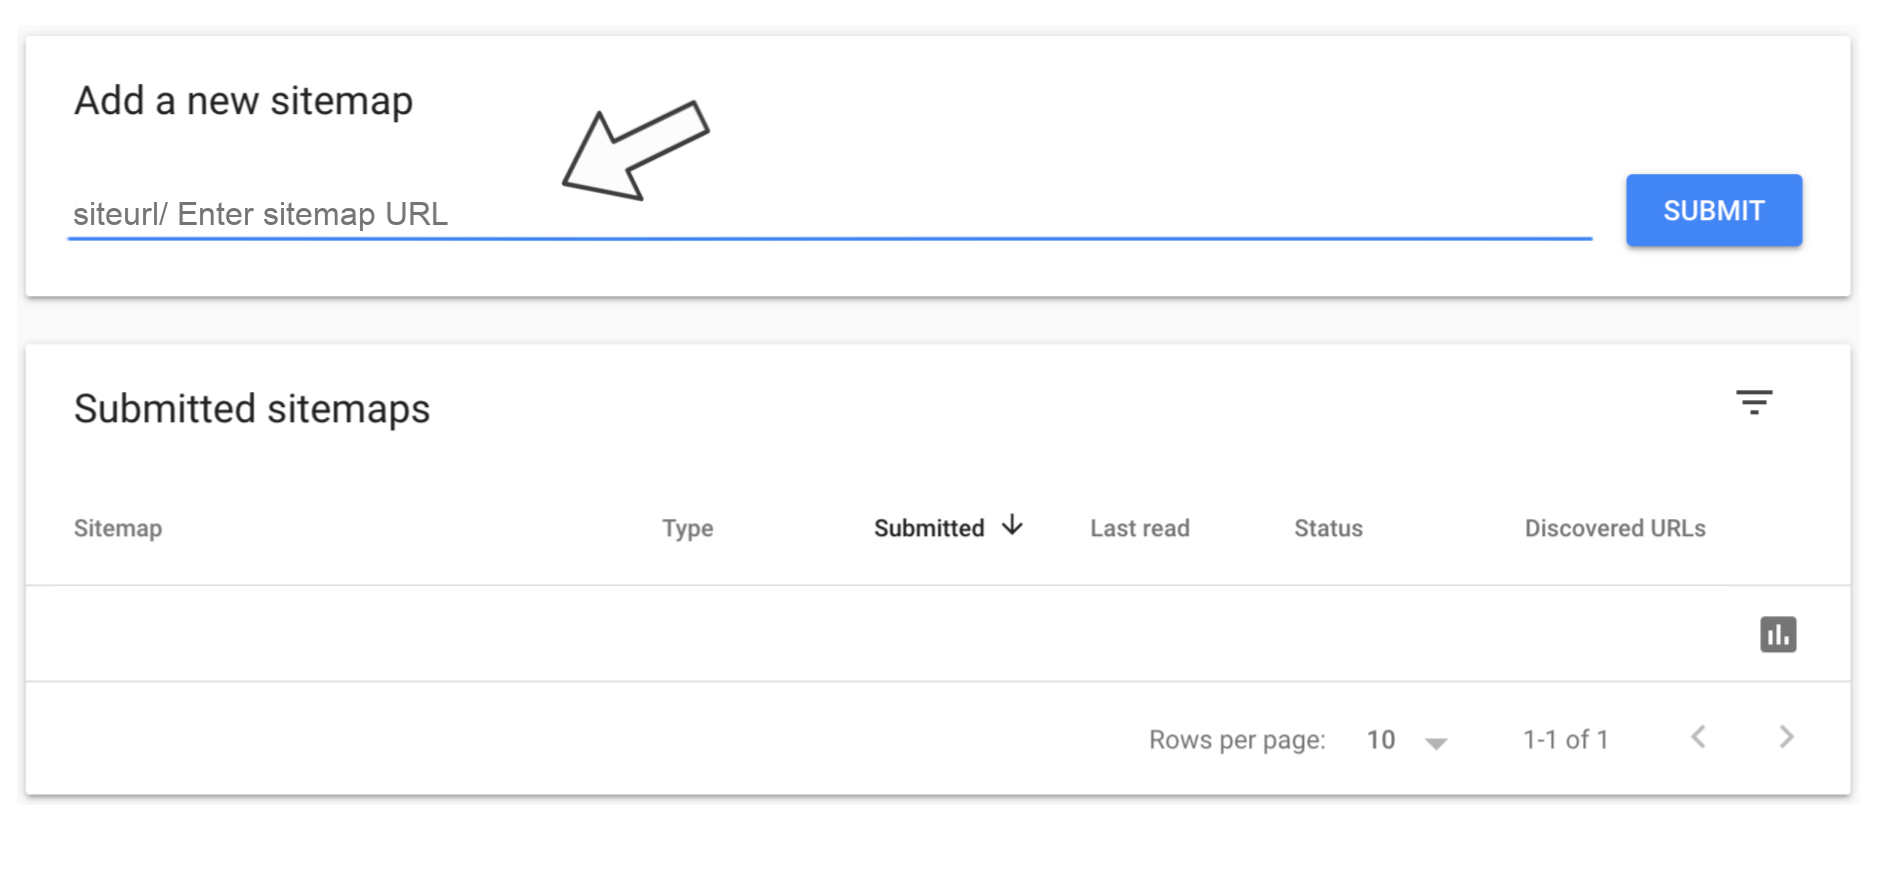
- In your Google Search Console account click Sitemaps. This can be found on the left-hand side.
- Now you need to generate a sitemap URL.
a) If your site is hosted on the WLD Design Tool the sitemap would have already been created for you.
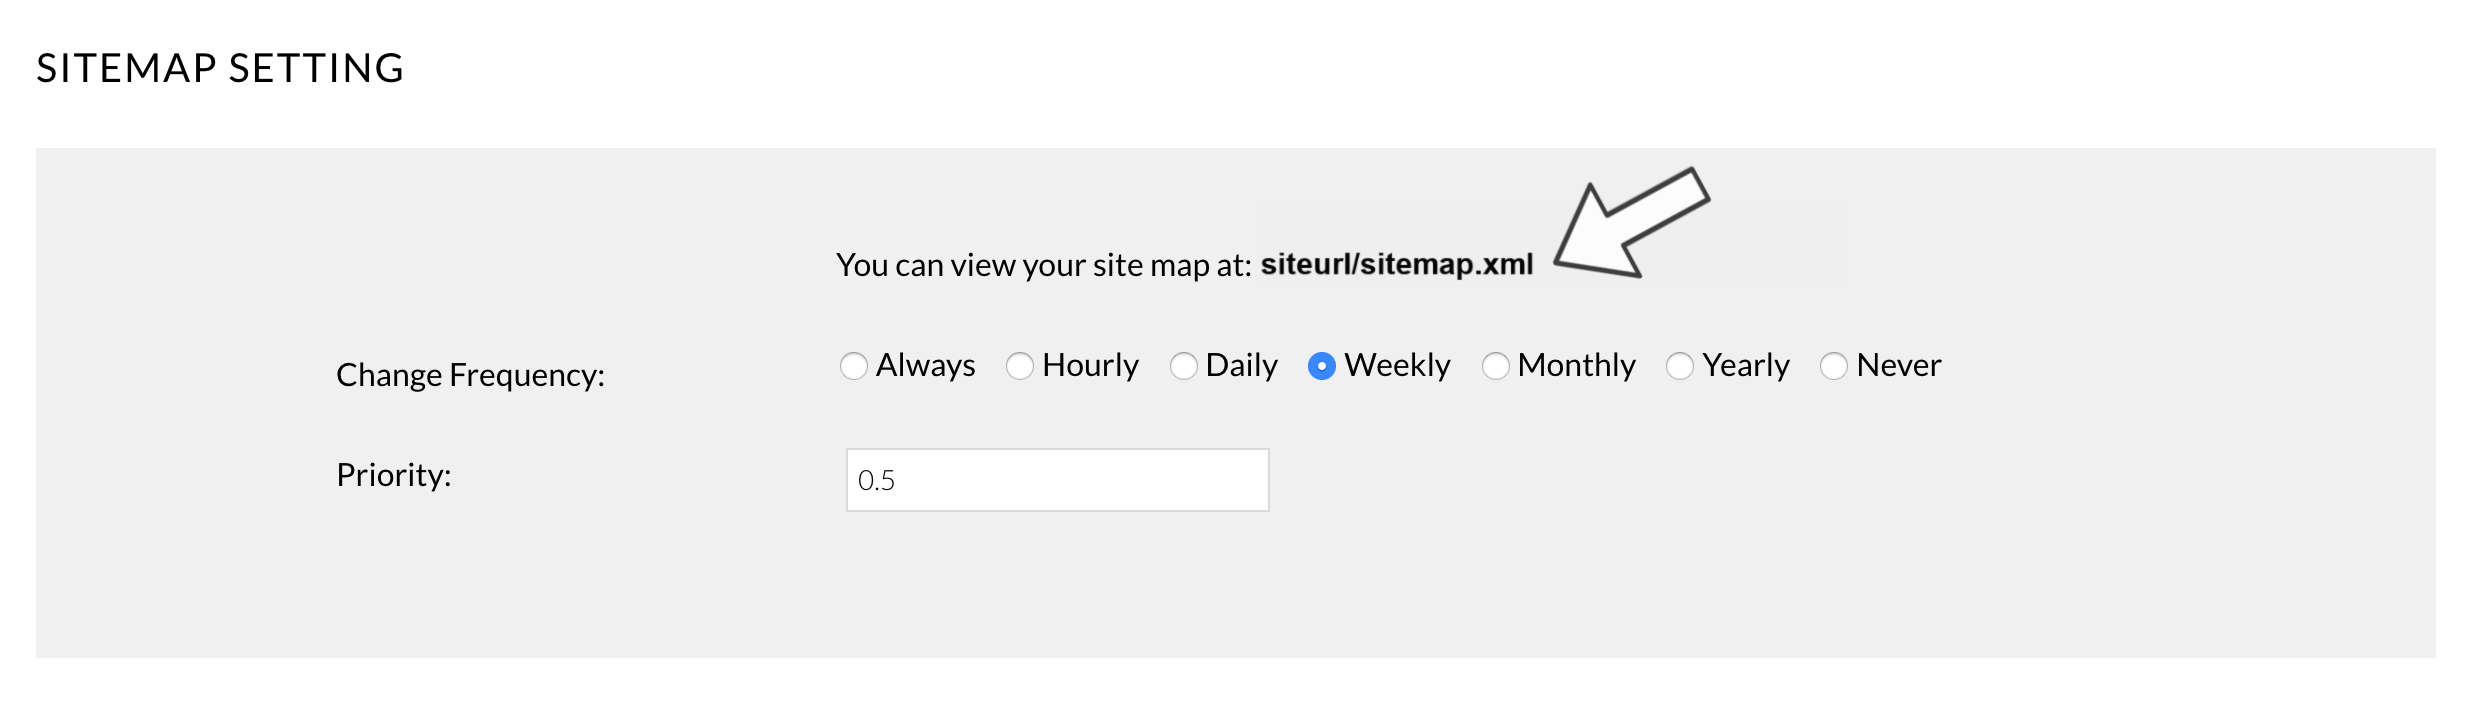 b) If you host the site yourself you will need to build a sitemap using a site generator. You can find a sitemap generator online.
 - Once your sitemap is live and created on your website, enter the sitemap URL and click Submit. Your sitemap will then appear under Submitted sitemaps.
Step 5: View your sites’ performance
Now you’re all set up it’s time to view your reports and track your websites performance on the Search Console dashboard. Here, you’ll be able to view impressions, clicks, click-through-rate (CTR) and the average position on the search results page.
It can take a few hours to a week before you see any data in your Google Search Console account. This is because Google needs to index and crawl your site.
Once the data pulls through, get in touch with your partner manager or reach out to [email protected] and discuss how you can improve and optimise your sites organic presence.